
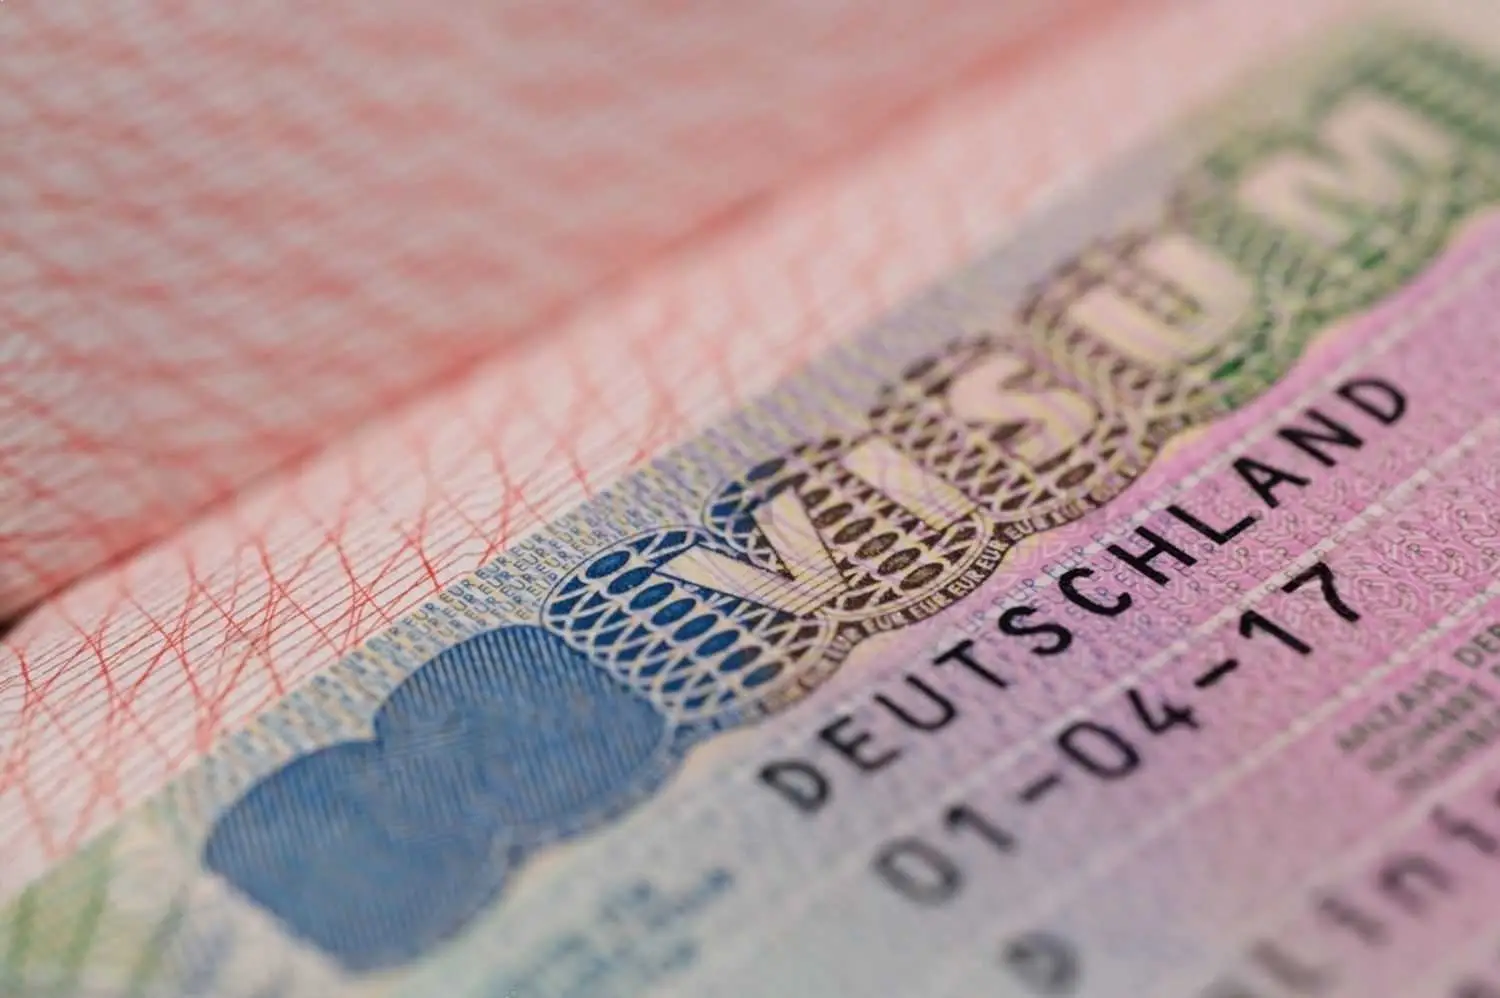
1. Overview of German Visa Categories: Which One Is Right for You?
2. How to Apply for a German Visa
3. Essential Documents
4. How Long Does the Visa Application Process Take?
5. Visa Fees and Costs
6. Health Insurance and the Role It Plays in Your Visa Approval
7. How to Prove Financial Stability for Your Visa Application
8. Visa Extensions and Renewals
9. How to Handle a Visa Denial. What Are Your Options?
10. How to Apply for a Residence Permit
11. After Arrival. Registering Your Address and Other Legal Obligations
12. Get Full Assistance With Your Visa
1. Overview of German Visa Categories. Which One Is Right for You?
Understanding Short-Term vs. Long-Term Visas
Before applying, it’s important to understand whether you need a short-term visa (Schengen Visa) or a long-term visa (National Visa or Aufenthaltstitel).
- Short-Term Visas (Schengen Visa – Type C): Allows stays of up to 90 days within a 180-day period. This is ideal for tourists, short business trips, or attending conferences but does not permit work or long-term residence.
- Long-Term Visas (National Visa – Type D): This visa is required for stays over 90 days and is the gateway to a residence permit. Examples include work visas, student visas, freelancer visas, and family reunification visas.
If your goal is to live in Berlin, you must apply for a long-term visa that matches your purpose of stay. Choosing the right visa is the foundation of your journey in Berlin. Whether you’re moving for work, study, freelancing, or family reasons, understanding the requirements and flexibility of each visa will help you plan for the long term. If you’re unsure which visa suits you best, consulting with an immigration expert or lawyer can save you time and prevent costly mistakes. Not sure about your next steps? We can manage your visa procedure end-to-end so you don’t have to worry.
Who Qualifies for Which Visa?
Each visa type has specific eligibility requirements. Here’s a breakdown of the most common visas and who qualifies for them:
- Job Seeker Visa – If you hold a recognized university degree and have at least five years of professional experience, you can apply for this visa, allowing you to stay in Germany for up to six months while searching for a job. To qualify, you must prove financial means by depositing up to €7,200 into a blocked account. The bank will lock the full amount, and you can access only the agreed monthly installments of €1,200 to cover your living expenses.
- Work Visa – If you have a job offer from a German employer that meets salary and industry requirements, i.e., ensuring fair compensation and addressing skill shortages in the labor market (check the Berlin salary overview here), you can apply for a work visa.
- Freelancer Visa – If you are a self-employed professional (e.g., artist, IT specialist, writer, consultant), you can apply for a freelance visa. You must show client contracts or job offers from German companies and prove financial sustainability.
- Student Visa – If you have been admitted to a German university, you can apply for a student visa. You must show financial proof (at least €11,904 in a blocked account) to cover living expenses.
- Family Reunification Visa – If you have a spouse, parent, or child who is a legal resident of Germany, you can apply for a family reunification visa. Spouses are required to demonstrate basic German language skills (A1 level).
- EU Blue Card – you have a university degree and a high-paying job offer, meaning you need to earn €48,300 gross/year, or €43,760 gross/year in shortage fields like IT and engineering. This visa grants you faster access to permanent residency and allows easier movement across the EU. Use this link to apply.
- Opportunity Card (Chancenkarte) – A new points-based visa introduced in 2025, allowing job seekers to enter Germany for up to one year to find employment. Eligibility is determined by factors such as qualifications, work experience, and language skills. Apply online here.
These amounts can vary depending on the specific requirements of the German embassy or consulate where you apply, and also depending on individual circumstances or updates to the cost-of-living estimates.
Transitioning from One Visa to Another
Many expats begin their journey in Germany with one visa and later transition to another that better suits their long-term plans. Here’s how:
- From a Job Seeker Visa to a Work Visa – Once you secure a job offer, you can switch from a Job Seeker Visa to a Work Visa or EU Blue Card without leaving Germany.
- From a Student Visa to a Work Visa – Graduates from German universities can remain in the country for 18 months after graduation to find a job and switch to a work visa.
- From a Freelancer Visa to Permanent Residency – After five years of living in Germany on a freelancer visa (or three years in some cases), you may apply for permanent residency if you have stable income and paid into the pension system.
- From an EU Blue Card to Permanent Residency – Blue Card holders can apply for a permanent residence permit in as little as 21 months if they meet German language requirements.
Each transition requires careful planning, ensuring you maintain legal status at all times. It’s crucial to track visa expiration dates and submit extension applications well in advance.
*Pro Tip: Always apply for the visa that best matches your long-term goals:
—If you’re unsure, consider a Job Seeker Visa as a flexible option. It allows you to search for a job while giving you time to decide which visa suits you best.
—Transitioning from this visa to a work or freelance visa is easier than switching from a tourist visa.
2. How to Apply for a German Visa
Determine the Right Visa Type
Before diving into applications, it’s essential to identify which visa suits your purpose. Berlin offers a variety of visa options depending on your goals and background.
- Work Visa: For professionals with a job offer in Berlin.
- Job Seeker Visa: Allows you to search for employment while in Germany.
- Student Visa: For those enrolling in German universities or language courses.
- Freelancer Visa: Ideal for self-employed individuals in creative or tech fields.
- Tourist Visa: For short-term stays (up to 90 days within 180 days).
Gather the Required Documents
Once you’ve identified the right visa, the next step is preparing your application. German authorities are meticulous, so ensure all documents are complete and accurate.
- Valid passport (with at least 6 months’ validity)
- Completed visa application form
- Passport-sized photos meeting German specifications
- Proof of financial means (bank statements, sponsorship letters, etc.)
- Health insurance coverage valid in Germany
- Proof of accommodation (rental agreement or hotel booking)
- Starting in the second half of 2025, travelers from all visa-free countries must obtain an online authorization (ETIAS) before entering Germany.
Schedule an Appointment
With your documents ready, it’s time to submit your visa application. This step requires attention to detail and patience.
—Where to Apply
- In Your Home Country: Applicants must apply at the German embassy or consulate in their home country.
- In Germany: If you’re already in Germany on a different visa, you may be able to switch visa types at the local Ausländerbehörde (Foreigners’ Office). If your German skills are insufficient, it is advisable to bring someone proficient in German to assist you with the task.
—Booking an Appointment
Visa applications often require an in-person appointment. However, Germany has introduced a fully digital visa application system through the Consular Services Portal, allowing applicants to submit applications online.
Book early, as slots can fill up quickly. Use the online booking system of the German embassy or consulate in your area. Keep in mind that it is not always possible to apply online via the official consulate website or Foreigners Office. Some embassies use third-party service to manage this process.
Attend the Visa Interview
The visa interview is a critical part of the process. It’s your opportunity to demonstrate your eligibility and intentions clearly. Here’s how to prepare:
- Dress Professionally: First impressions matter. Wear business casual or formal attire to show you’re serious.
- Bring All Documents: Carry originals and copies of your application, passport, photos, financial proof, and any supporting documents.
- Practice Common Questions: Be ready to answer questions about your purpose of visit, financial stability, and ties to your home country. For example:
- Why do you want to move to Berlin?
- How long do you plan to stay?
- What will you do if your visa application is denied?
- Be Honest and Confident: Answer questions clearly and truthfully. If you don’t understand something, politely ask for clarification.
- Show Proof of Ties to Your Home Country: This could include property ownership, family ties, or a job you plan to return to. It helps assure the officer you don’t intend to overstay your visa.
—What to Expect During the Appointment
Be prepared to provide biometric data (fingerprints and photos) and answer questions about your application.
The interview is usually brief but thorough. Arrive at least 15 minutes early for your appointment. Bring a pen, notebook, and a folder to keep your documents organized. Smile, stay calm, and treat the interview as a professional conversation.
It is highly recommended to bring someone fluent in German if your language skills are not strong enough —you don’t want to risk ruining this interview. Find someone to go with you to the visa interview.
Pay the Visa Fee
Visa fees vary depending on the type of visa and your nationality. Here’s a general breakdown:
- Tourist Visa: €90 (short-term Schengen visa)
- Work Visa: €75
- Student Visa: €75
- Freelancer Visa: €100
- Job Seeker Visa: €75
- Blue Card Visa: €75
Payment is typically made during your visa appointment, and fees are non-refundable even if your application is denied. Some applicants, such as students or researchers, may be eligible for reduced fees or exemptions.
Wait for Processing
After submitting your application, the waiting game begins. Processing times vary depending on the visa type and your nationality.
—Typical Processing Times
- Tourist Visa: 10-15 days
- Work Visa: 1-3 months
- Student Visa: 4-6 weeks
- Freelancer Visa: 2-4 months
—Tracking Your Application
Some embassies offer online tracking systems. If not, you can contact the embassy or consulate for updates. Check out our visa Relocation Kit, where you get periodical updates on your status.
—What to Do If Your Visa Is Delayed
If processing takes longer than expected, follow up politely. Delays can happen due to high demand or missing documents.
Receive Your Visa and Travel to Germany
Once your visa is approved, it’s time to prepare for your new life in Berlin.
—Notify Relevant Authorities
Some visas, particularly those with conditions, may require additional reporting to the Ausländerbehörde. For example:
- Job Seeker Visas: While not always a strict “report arrival” requirement, you may need to update them when you secure employment.
- Certain residence permits: May have conditions related to employment or study that require updates.
—Arrange Accommodation
Secure temporary or permanent housing before arriving. Websites like WG-Gesucht and Craigslist are great resources.
—Register Your Address
After arriving in Berlin, you must register your address at the Bürgeramt (Citizens’ Office). This is a legal requirement for all residents, regardless of their visa type. Appointments at the Bürgeramt can be hard to come by. Use the online booking system and check for last-minute cancellations. Bring a German-speaking friend if you’re not confident in your language skills. It will make the process smother.
It is a good practice to check for appointments in the early hours (before 8 in the morning), as this is usually when they post free slots, or just go to the Office before that time because slots may become available from people who didn’t show up.
—Common Pitfalls to Avoid
Missing deadlines or failing to provide required documents can lead to delays or rejection. Stay organized and proactive.
—Stay Informed and Compliant
Once you’re settled in Berlin, staying informed about visa regulations and compliance is key to a stress-free experience.
—Seek Help When Needed
If you’re unsure about any aspect of your visa, consult an immigration lawyer or expat support organization. Subscribe to newsletters or follow social media accounts of the German Federal Foreign Office for updates on visa policies.
*Pro Tip: Treat your visa application like a project:
—Break it into small, actionable steps and tackle one at a time.
—Start by identifying the exact documents you need for your specific visa type, then set deadlines for gathering each one. For example, if you need a certified translation of your diploma, schedule it a week before your appointment.
—Practice your interview answers with a friend or mentor to build confidence, and always bring extra copies of everything to your appointment.
—Staying organized and proactive will not only reduce stress but also show the visa officer that you’re serious and prepared.
3. Essential Documents
The Basics
- Valid Passport: Your passport must be valid for at least six months beyond your planned stay.
- Visa Application Form: A completed application form specific to the visa type you are applying for.
- Passport-sized Photos: Two recent, biometric photos that meet German visa photo standards.
- Proof of Health Insurance: Health insurance coverage is mandatory for all visa applications.
Documents for Specific Visa Types Different visas require additional documentation beyond the basic essentials. Here’s a breakdown based on your visa category:
Job Seeker Visa
- University Degree: A recognized qualification from a university or higher education institution.
- Proof of Professional Experience: Documentation like work contracts, references, or pay slips for at least five years of experience.
- Proof of Financial Means: Show financial stability through a blocked account (at least €1,200/month) or other financial documentation.
Work Visa
- Job Offer: An official offer letter from a German employer outlining salary and job role.
- Qualifications: Proof of education or skills that match the job requirements, such as degrees or certificates.
- Salary Details: Evidence that your salary meets industry standards and the minimum requirement for the visa.
Freelancer Visa
- Client Contracts: Documentation of existing or potential contracts with clients or companies in Germany.
- Business Plan: A clear plan outlining your business, target market, and projected income.
- Proof of Financial Sustainability: Documents showing your income, savings, or financial resources to support yourself.
Student Visa
- University Admission Letter: A formal offer from a German university or educational institution.
- Proof of Financial Support: Evidence of funds, either through a blocked account or a sponsor, to cover living expenses.
- Proof of Language Skills: Some universities may require proof of proficiency in German or English, depending on the program.
Family Reunification Visa
- Proof of Relationship: Marriage certificate, birth certificate, or other documents proving family ties.
- Sponsor’s Residency Proof: Evidence that your family member is legally residing in Germany, such as their visa or permit.
- Language Proficiency: Depending on your relationship type, you may need to demonstrate basic German language skills (A1 level).
*Pro Tip: Keep your documents organized and ready. Missing or incomplete documents can cause long delays, especially in the visa application process. Ensure all translations are certified, and double-check each document before submission.
4. How Long Does the Visa Application Process Take?
Understanding the timeline for your visa application is essential to avoid any surprises. The process can vary depending on the type of visa, the consulate or embassy you’re dealing with, and your personal circumstances. Here, we break down the general timeline for visa applications, what factors can influence processing time, and tips on how to ensure a smooth application process.
General Processing Times
- Short-Term Visas (Schengen Visa): Typically processed within 15 calendar days. However, it’s recommended to apply at least 3 weeks in advance to account for potential delays.
- Long-Term Visas (National Visa): These can take anywhere from 6 to 12 weeks, depending on the visa type and the workload of the consulate or immigration office.
Factors Influencing Processing Time
Several factors can affect how quickly your visa is processed, including:
- Visa Type: Some visas, like the Job Seeker or Family Reunification Visa, may take longer to process due to the amount of documentation required.
- Volume of Applications: During peak seasons, like summer or the beginning of the year, consulates can experience a high volume of applications, leading to longer processing times.
- Completeness of Your Application: If your application is missing documents or contains errors, it could be delayed. Always double-check your paperwork before submission.
Expedited Processing Options
Some consulates offer expedited processing for an additional fee. This can significantly shorten processing times, sometimes to as little as a week for certain visa types. However, expedited processing is not available for all visa categories, so you should confirm the options with the specific embassy or consulate where you are applying.
*Pro Tip: Apply early and allow for extra time. Visa processing is unpredictable; applying late may mean missing your arrival date. Make sure to apply at least 3 months before your planned departure to Germany to ensure everything goes smoothly.
5. Visa Fees and Costs
Standard Visa Fees for Germany
Visa fees vary depending on the type of visa and your nationality. Here’s a breakdown of the most common costs:
- Tourist Visa (Schengen): €90 for adults, €45 for children aged 6-12, and free for children under 6.
- Work Visa: €75 for most applicants. Highly skilled professionals applying for a Blue Card may pay from €100 to €140 depending on each region of Germany.
- Student Visa: €75, with reduced fees or exemptions for certain nationalities or scholarship holders.
- Freelancer Visa: €100, as it requires additional documentation and processing.
- Job Seeker Visa: €75, allowing you to search for employment in Germany for up to 6 months.
- Opportunity Card (Chancenkarte): €75, allowing skilled workers to enter Germany for up to one year to search for employment, with the ability to work part-time (up to 20 hours per week) and take trial employment for up to two weeks with any single employer.
- Family Reunification Visa: €75 for spouses and family members joining relatives in Germany, with about €100 for the residence permit application once in Germany.
- Au Pair Visa: €75, requiring proof of basic German language skills (A1 level) and a signed contract with a German host family.
- Language Course Visa: €75 for those entering Germany to attend intensive language programs, requiring proof of enrollment and financial resources.
Always check the official website of the German embassy or consulate in your country for the most accurate and up-to-date fee information. Fees are non-refundable, even if your application is denied, so ensure you meet all requirements before applying.
Other Costs You Might Not Expect
Beyond the visa fee, there are several additional expenses to budget for:
- Certified Translations: Official documents not in German or English must be translated by a certified translator, costing €30-€50 per page.
- Health Insurance: Proof of health insurance is mandatory. Plans for visa applicants can go from €110 up, depending on factors like age, health condition, and coverage level.
- Travel to the Embassy/Consulate: If you live far from the nearest German embassy, factor in travel and accommodation costs for your appointment.
- Postage or Courier Fees: Some embassies require you to pay for return postage to receive your passport with the visa.
Create a detailed budget spreadsheet that includes all potential costs. Add a 10% buffer for unexpected expenses to avoid last-minute financial stress.
How to Save Money on Your Visa Application
While visa costs are unavoidable, there are ways to minimize expenses:
- Apply Early: Avoid rush fees or expedited processing by submitting your application well in advance.
- Check for Fee Waivers: Students, researchers, and certain nationalities may qualify for reduced fees or exemptions.
- Use Free Resources: Many embassies provide free checklists and guides to help you avoid mistakes that could lead to reapplication fees.
- Bundle Services: If you need multiple documents (e.g., translations, notarizations), look for service providers that offer package deals.
Research expat forums or Facebook groups for tips from others who’ve gone through the process. They often share cost-saving hacks and recommendations for affordable services like translators or insurance providers.
*Pro Tip: Turn your visa application into a financial roadmap by creating a “Visa Budget Tracker.”
—Start by listing all potential costs: Visa fees, translations, insurance, travel, and even small expenses like passport photos or notary fees.
—Then, assign deadlines to each expense and set aside a small amount weekly or monthly to cover them. For example, if your total visa costs are €500 and you have 10 weeks until your appointment, save €50 per week.
—Use cashback apps or rewards credit cards for payments like health insurance or translation services. Some cards offer travel miles or cashback on international transactions, which you can use for your flight to Berlin.
—Check if your bank offers fee-free currency conversion to save on exchange rates when paying in euros.
6. Health Insurance and the Role It Plays in Your Visa Approval
Why Health Insurance is Mandatory for Your Visa
Health insurance is a cornerstone of Germany’s social system, and the government requires all residents —including visa applicants— to have adequate coverage. Here’s why:
- Legal Requirement: Without proof of health insurance, your visa application will be rejected.
- Financial Protection: Germany has high healthcare standards but also high costs. Insurance ensures you won’t face crippling medical bills.
- Peace of Mind: Knowing you’re covered allows you to focus on settling into your new life in Berlin.
Don’t wait until the last minute to arrange health insurance. Start researching plans at least 4-6 weeks before your visa appointment to ensure you meet all requirements.
Types of Health Insurance for Visa Applicants
Not all health insurance plans are created equal. The type of insurance you need depends on your visa and personal circumstances:
- Public Health Insurance (Gesetzliche Krankenversicherung): As of 2026, this compulsory insurance threshold is €77,400 per year. It covers most medical expenses and is accepted for Work and Student Visas.
- Private Health Insurance (Private Krankenversicherung): Ideal for freelancers, self-employed individuals, or high-income earners. Offers more flexibility but can be costly.
- Travel Health Insurance: Suitable for short-term stays (e.g., Tourist Visa or Job Seeker Visa). Must meet Schengen visa requirements, including coverage of at least €30,000 and validity across all Schengen countries.
If you’re unsure which type of insurance to choose, consult an insurance broker who specializes in expat health insurance. They can help you find a plan that meets visa requirements and fits your budget.
How to Choose the Right Health Insurance Plan
Selecting the right plan can feel overwhelming, but focusing on these key factors will simplify the process:
- Coverage Amount: Ensure the plan meets the minimum coverage required for your visa type (e.g., €30,000 for Schengen visas).
- Validity Period: The insurance must cover your entire stay in Germany. For long-term visas, you’ll need a plan that can be extended or switched to public insurance later.
- Reputation of the Provider: Choose a reputable insurer recognized by German authorities. Popular options for expats include TK, Ottonova, and Mawista.
- Language Support: Opt for a provider that offers customer service in English or your native language to avoid communication barriers.
Read reviews from other expats about their experiences with different insurers, this can provide valuable insights.
Common Mistakes to Avoid
Many visa applicants stumble when it comes to health insurance. Here’s how to avoid common pitfalls:
- Insufficient Coverage: Double-check that your plan meets the minimum requirements for your visa type.
- Expired Insurance: Ensure your policy is valid for the entire duration of your stay.
- Wrong Type of Insurance: For example, travel insurance won’t suffice for a long-term Work Visa.
- Missing Documentation: Submit a clear, official confirmation letter from your insurer that outlines your coverage details.
Before your visa appointment, create a checklist of all health insurance-related documents, including insurance confirmation letter, policy details (coverage amount, validity period, etc.), and proof of payment.
*Pro Tip: Your health insurance provider can be more than just a safety net. Many insurers offer expat-friendly services like:
- Free German language courses (e.g., TK offers discounts on language schools).
- Wellness programs (yoga, gym memberships, or mental health support).
- Networking events or workshops for expats.
When choosing a provider, ask about additional benefits for expats. Not only will you meet visa requirements, but you’ll also gain access to resources that help you settle into Berlin faster.
7. How to Prove Financial Stability for Your Visa Application
Why Financial Proof Matters
Financial stability is a key requirement for most German visas because:
- It shows you can cover living expenses (rent, food, transportation, etc.) without financial strain.
- It reduces the risk of you becoming a burden on Germany’s social welfare system.
- It reassures authorities that you’re serious about your move and have planned accordingly.
Start gathering financial documents as soon as you decide to apply for a visa. The earlier you prepare, the smoother the process will be.
How Much Money Do You Need?
The amount of money required depends on your visa type and personal circumstances. Here’s a general guideline:
- Student Visa: €11,904 per year, held in a blocked account (Sperrkonto). This amount is based on the cost of living for students in Germany.
- Job Seeker Visa: Proof of sufficient funds to cover a minimum of 6 months of living expenses, showing a blocked account with at least €947 per month.
- Freelancer Visa: Evidence of steady income or savings to support yourself until your business becomes profitable. Besides savings and income, some applicants also need to provide proof of potential future earnings, such as client contracts or letters of intent from German clients.
- Tourist Visa: Account €50-€70 per day of your stay, depending on your accommodation and travel plans.
Check the latest financial requirements on the website of the German embassy or consulate in your country, as these amounts can change annually.
Accepted Forms of Financial Proof
German authorities accept several types of documents to prove financial stability. Choose the option that best suits your situation:
- Blocked Account (Sperrkonto): Mandatory for Student Visas, this account holds your funds and releases them monthly (a minimum of €947). Popular providers include Coracle, Fintiba, and Expatrio.
- Bank Statements: Show consistent savings or income over the past 3-6 months. Ensure the statements are official, stamped, and translated if necessary.
- Sponsorship Letter: If someone (e.g., a parent or employer) is funding your stay, they must provide a notarized letter and proof of their financial ability (e.g., bank statements or employment contract).
- Scholarship or Grant: Official documentation from the awarding institution, detailing the amount and duration of the funding.
- Employment Contract: For Work Visas, a signed contract showing your salary and job start date can serve as proof of financial stability.
If you’re using a blocked account, open it at least 4-6 weeks before your visa appointment to ensure the funds are processed and documented in time.
How to Strengthen Your Financial Proof
To make your financial proof as convincing as possible, follow these tips:
- Show Consistency: Authorities prefer steady income or savings over sudden large deposits. If you’re using bank statements, ensure they reflect consistent financial behavior.
- Provide Multiple Sources: If possible, combine different types of proof (e.g., blocked account + sponsorship letter) to strengthen your case.
- Translate and Notarize: If your documents are in another language, have them translated into German or English by a certified translator. Some documents may also require notarization.
- Be Transparent: Clearly explain any unusual transactions (e.g., large deposits) in a cover letter to avoid raising red flags.
Create a financial proof checklist to ensure you have all required documents. Include columns for document type, status (e.g., “Ready,” “Pending”), and deadlines.
Common Mistakes to Avoid
Many applicants make avoidable errors when proving financial stability. Here’s how to steer clear of them:
- Insufficient Funds: Ensure your savings or income meet the minimum requirements for your visa type.
- Last-Minute Deposits: Sudden large deposits in your account can raise suspicions. Plan ahead and build your savings gradually.
- Missing Documentation: Double-check that all documents are complete, translated, and notarized if required.
- Unclear Sponsorship Letters: If you’re using a sponsorship letter, ensure it includes all necessary details (e.g., sponsor’s financial status, relationship to you, and commitment to support you).
Before submitting your application, have a trusted friend, mentor, or immigration consultant/lawyer review your financial documents to catch any mistakes or omissions.
8. Visa Extensions and Renewals
When Do You Need to Extend or Renew Your Visa?
Not all visas are created equal, and some have expiration dates that require action. Here’s when you might need to extend or renew:
- Student Visa: Typically issued for 1-2 years, requiring renewal if your program lasts longer.
- Job Seeker Visa: Valid for 6 months, with no extensions unless you find a job and switch to a Work Visa.
- Work Visa: Often tied to your employment contract, requiring renewal if your contract is extended or you change jobs.
- Freelancer Visa: Usually issued for 1-3 years, with renewal required to continue working as a freelancer.
- Tourist Visa: Non-extendable beyond 90 days within a 180-day period. While the 90-day Schengen Visa is generally non-extendable, extensions can be granted under exceptional circumstances (e.g., medical emergencies).
- EU Blue Card: Issued for the duration of your work contract plus three months, up to a maximum of four years. After 33 months (or 21 months with B1-level German), holders can apply for permanent residency.
Mark your visa expiration date on your calendar and set a reminder to start the renewal process 3 months in advance. This gives you ample time to gather documents and book appointments.
How to Apply for a Visa Extension or Renewal
The process for extending or renewing your visa is similar to the initial application but with a few key differences. Here’s what you need to do:
- Book an Appointment: Visit your local Ausländerbehörde (Foreigners’ Office) to schedule an appointment (keyword: “Online-Antrag”). In major cities like Berlin, slots can fill up quickly, so book early.
- Gather Required Documents: These typically include:
- Valid passport
- Current visa or residence permit
- Proof of financial stability (e.g., bank statements, employment contract)
- Proof of accommodation (e.g., rental agreement)
- Health insurance confirmation
- Additional documents specific to your visa type (e.g., university enrollment for Student Visas, client contracts for Freelancer Visas).
- Submit Your Application: Attend your appointment, submit your documents, and pay the renewal fee. Temporary residence permits may cost between €100 and €150, while permanent residence permits can cost up to €250.
- Wait for Approval: Processing times vary, but you’ll typically receive a decision within 4-6 weeks. While 4-6 weeks is a general estimate, in major cities like Berlin, visa renewals can take much longer (several months).
Common Reasons for Visa Renewal Denials
While most renewals are straightforward, some applications are denied due to avoidable mistakes. Here’s what to watch out for:
- Insufficient Financial Proof: Ensure your bank statements or income meet the minimum requirements.
- Lapsed Health Insurance: Your insurance must be valid for the entire renewal period.
- Incomplete Documentation: Missing or outdated documents can lead to delays or denials.
- Overstaying Your Visa: Applying after your visa has expired can result in fines or potential legal issues.
Before submitting your renewal application, double-check all documents against the official checklist provided by the Ausländerbehörde. If you’re unsure, consult an immigration lawyer or expat advisor.
What If Your Visa Expires Soon and You Haven’t Renewed
If your visa is about to expire and you haven’t started the renewal process, don’t panic. Here’s how to handle the situation:
- Contact the Ausländerbehörde Immediately: Explain your situation and request an emergency appointment.
- Apply for a Fiktionsbescheinigung: This temporary document allows you to stay in Germany legally while your renewal is processed.
- Avoid Overstaying: Even a single day over your visa expiration can lead to fines or a ban on re-entering Germany.
Keep a copy of your Fiktionsbescheinigung with you at all times, as it serves as proof of your legal status during the renewal process.
Switching Visa Types
Sometimes, your circumstances change, and you may need to switch to a different visa type. For example:
- Student Visa to Work Visa: After completing your studies, you can switch from a Student Visa to a Work Visa upon securing employment. Ensure your job matches your qualifications and that you meet all necessary requirements.
- Job Seeker Visa to Work Visa: If you enter Germany on a Job Seeker Visa and find employment, you can convert it to a Work Visa. Provide proof of your employment contract and ensure your qualifications align with the job.
- Freelancer Visa to Work Visa: If you initially entered Germany on a Freelancer Visa but later decide to pursue employment, you can switch to a Work Visa. Present a job offer and meet the necessary criteria.
Research the requirements for your new visa type well in advance. Some transitions (e.g., Student to Work Visa) require additional steps, such as proving your degree is recognized in Germany.
*Pro Tip: To avoid last-minute stress, create a visa renewal timeline that breaks the process into manageable steps. For example:
-3 Months Before Expiration: Research renewal requirements and gather documents.
-2 Months Before Expiration: Book your Ausländerbehörde appointment.
-1 Month Before Expiration: Submit your application and follow up if necessary.
-2 Weeks Before Expiration: Confirm your renewal status and prepare for any additional requests from the authorities.
—Use project management tools like Trello, Plaky, or Notion to track your progress and stay organized. This ensures you never miss a deadline or forget a document.
9. How to Handle a Visa Denial. What Are Your Options?
Common Reasons for Visa Renewal Denials
Visa applications are denied for a variety of reasons, many of which are avoidable. Here are the most common:
- Insufficient Financial Proof: Failing to demonstrate adequate funds to support yourself during your stay.
- Incomplete or Incorrect Documentation: Missing or improperly filled-out forms, untranslated documents, or lack of required evidence.
- Lack of Health Insurance: Not providing proof of valid health insurance that meets German requirements.
- Overstaying a Previous Visa: A history of visa violations can lead to automatic rejections.
- Unclear Purpose of Stay: If the authorities doubt your intentions (e.g., suspect you plan to overstay or work illegally), your application may be denied.
Carefully review the rejection letter from the embassy or consulate. It will specify the exact reason for the denial, which is your starting point for addressing the issue.
Steps to Take Immediately After a Denial
If your visa is denied, don’t panic. Follow these steps to assess your situation and plan your next move:
- Read the Rejection Letter Thoroughly: Understand the specific reason for the denial and any instructions provided.
- Contact the Embassy or Consulate: Politely request clarification if the reason is unclear. Sometimes, a simple misunderstanding can be resolved quickly.
- Seek Professional Help: Consult an immigration lawyer or visa consultant who specializes in German visas. They can help you identify mistakes and guide you through the appeals process.
- Gather Additional Evidence: If the denial was due to insufficient documentation, start collecting the missing or corrected documents immediately.
Keep a calm and professional demeanor when communicating with embassy staff. Being polite and cooperative can sometimes lead to more helpful responses. Consider searching for legal help to make sure you are on the right track moving forward.
How to Appeal a Denial
In some cases, you can appeal the decision or request a review of your application. Here’s how:
- File an Appeal (Remonstration): Submit a formal appeal to the embassy or consulate within the timeframe specified in your rejection letter, typically one month from the decision date. In your appeal, provide a detailed explanation addressing the reasons for the denial and include any additional evidence that supports your case.
- Request a Review: If an appeal isn’t feasible, you may request a review of your application. This process is less formal but still requires substantial evidence to potentially overturn the initial decision. It’s advisable to contact the relevant embassy or consulate for specific guidance on this one.
- Reapply: Should the appeal be unsuccessful or not an option, you can submit a new application. Ensure that you address the reasons for the initial denial by providing additional or clarified documentation. Including a cover letter that directly addresses the previous denial reasons and outlines how you’ve resolved the issues demonstrates your commitment and thoroughness.
Strengthening Your Next Application
A visa denial doesn’t mean you’ll never get approved. Use the experience as a learning opportunity to strengthen your next application. Here’s how:
- Address the Denial Reason: If your financial proof was insufficient, open a blocked account or increase your savings. If your documents were incomplete, double-check the requirements and submit everything in order.
- Seek Professional Feedback: Have an immigration expert review your application before submitting it again. They can spot potential issues you might have missed.
- Improve Your Documentation: Ensure all documents are translated, notarized, and organized according to embassy guidelines.
- Be Transparent: If you’ve had previous visa issues (e.g., overstaying), address them honestly in your application and explain how you’ve rectified the situation.
Create a visa application checklist that includes every document and requirement. Tick off each item as you prepare your new application to ensure nothing is overlooked.
When to Consider Alternative Options
If your visa denial seems insurmountable, it may be time to explore alternative paths to Germany. Here are some options:
- Apply for a Different Visa Type: If your initial application was for a Work Visa but was denied due to lack of a job offer, consider applying for a Job Seeker Visa instead.
- Study in Germany: Enrolling in a German university can give you access to a Student Visa, which may lead to a Work Visa after graduation.
- Freelance or Start a Business: If you have marketable skills, consider applying for a Freelancer Visa or setting up a business in Germany.
- Marriage or Family Reunification: If you have a partner or family member in Germany, explore visa options for joining them.
Research alternative visa types and their requirements on the German Federal Foreign Office website or consult an immigration expert to find the best path for your situation.
*Pro Tip: Research alternative visa types and their requirements on the German Federal Foreign Office website or consult an immigration expert to find the best path for your situation.
10. How to Apply for a Residence Permit
What Is a Residence Permit and Why Do You Need It?
A residence permit is an official document that allows you to live in Germany for a specific purpose and duration. Unlike a visa, which is typically issued for short-term stays, a residence permit is designed for long-term stays and can often be extended or converted into permanent residency. Here’s why it’s important:
- Legal Requirement: If you plan to stay in Germany longer than 90 days, you’ll need a residence permit.
- Access to Services: A residence permit allows you to open a bank account, sign long-term rental agreements, and access healthcare and other services.
- Pathway to Permanent Residency: Many residence permits can eventually lead to a permanent residency permit (Niederlassungserlaubnis), fulfilling language proficiency requirements, and demonstrating financial stability.
Start planning your residence permit application as soon as you arrive in Germany. Delays can lead to gaps in your legal status.
Types of Residence Permits
The type of residence permit you need depends on your purpose for staying in Germany. Here are the most common types:
- Work Residence Permit: For employees with a job offer in Germany.
- Student Residence Permit: For international students enrolled in a German university or language course.
- Freelancer Residence Permit: For self-employed individuals in creative, academic, or technical fields.
- Family Reunification Residence Permit: For joining a spouse, partner, or family member who is a legal resident in Germany.
- Job Seeker Residence Permit: For individuals searching for employment in Germany (valid for 6 months).
opportunities.
Opportunity Card: This card allows qualified individuals to enter Germany and search for employment.
Research the specific requirements for your residence permit type on the German Federal Foreign Office (Auswärtige Amt) website or consult your local Ausländerbehörde (Foreigners’ Office).
How to Apply for a Residence Permit
The application process for a residence permit involves several steps. Here’s a step-by-step guide:
- Book an Appointment: Visit your local Ausländerbehörde to schedule an appointment. In major cities like Berlin, slots can fill up quickly, so book early.
- Gather Required Documents: These typically include:
- Valid passport
- Current visa (if applicable)
- Proof of financial stability (e.g., bank statements, employment contract)
- Proof of accommodation (e.g., rental agreement)
- Health insurance confirmation
- Additional documents specific to your permit type (e.g., university enrollment for Student Permits, client contracts for Freelancer Permits).
- Submit Your Application: Attend your appointment, submit your documents, and pay the fee. The standard fee for the initial issuance of a residence permit is €100 for adults and €50 for minors.
- Wait for Approval: Processing times vary. Typically, decisions are made within 1 to 3 months. In some cases, you may receive a certificate (Fiktionsbescheinigung) that allows you to stay in Germany legally while your application is being processed.
Common Mistakes to Avoid
Many applicants make avoidable errors when applying for a residence permit. Here’s how to steer clear of them:
- Insufficient Financial Proof: Ensure your bank statements or income meet the minimum requirements.
- Lapsed Health Insurance: Your insurance must be valid for the entire duration of your stay.
- Incomplete Documentation: Missing or outdated documents can lead to delays or denials.
- Overstaying Your Visa: Applying after your visa has expired can result in fines or deportation.
Before submitting your application, double-check all documents against the official checklist provided by the Ausländerbehörde. If you’re unsure, consult an immigration lawyer or expat advisor.
Extending or Changing Your Residence Permit
If your circumstances change, you may need to extend or switch your residence permit. For example:
- Extending a Student Permit: If your program lasts longer than expected, apply for an extension before your current permit expires.
- Switching to a Work Permit: After graduating, you can switch to a Work Permit if you secure employment.
- Extending a Freelancer Permit: Provide updated client contracts and proof of income to extend your permit.
Start the extension or change process at least 3 months before your current permit expires to avoid gaps in your legal status.
*Pro Tip: The residence permit process involves many small but important tasks, like translating a document or booking an appointment.
—Use the “two-minute rule”: if a task takes less than two minutes, do it immediately. This prevents small tasks from piling up and overwhelming you later.
—Keep a running list of quick tasks (e.g., emailing a translator, printing a document) and tackle them as soon as they come up. This keeps the momentum going and makes the bigger tasks feel more manageable.
—Don’t navigate the residence permit process alone. Reach out to friends, colleagues, or expat communities who’ve been through it before. They can offer advice, share resources, and even proofread your documents. A strong support network makes the process easier and gives you a sense of encouragement. Let us take care of the residence permit. Check our visa Relocation Kit.
11. After Arrival. Registering Your Address and Other Legal Obligations
Why Registering Your Address Is Mandatory
In Germany, registering your address (Anmeldung) is a legal requirement for all residents, including expats. Here’s why it’s important:
- Legal Compliance: Failing to register within two weeks of moving can result in fines.
- Access to Services: You need your registration confirmation (Anmeldebestätigung) to open a bank account, sign up for health insurance, and get a tax ID.
- Proof of Residency: Your registration serves as proof of address for various administrative processes.
Start the registration process as soon as you secure accommodation. Delays can complicate other tasks like setting up utilities or applying for a residence permit.
—If you change apartments within Berlin, you must re-register your new address. The process is similar to your initial registration:
- Book an Appointment: Schedule a new appointment at the Bürgeramt.
- Update Your Documents: Provide your new rental agreement and Wohnungsgeberbestätigung.
- Notify Relevant Authorities: Update your address with your bank, health insurance provider, and employer.
Use the move as an opportunity to declutter and organize your documents. Keep digital copies of everything for easy access.
Other Legal Obligations After Arrival
Beyond registering your address, there are a few more legal steps to complete:
- Apply for a Tax ID (Steuer-ID): Your tax ID will be mailed to you automatically after registering your address. It’s essential for employment, freelancing, and filing taxes.
- Set Up Health Insurance: If you haven’t already, finalize your health insurance coverage. Public or private insurance is mandatory for all residents.
- Open a Bank Account: Use your Anmeldebestätigung to open a German bank account. This is necessary for receiving salaries, paying rent, and managing finances.
- Register for Utilities: If not included in your rent, set up electricity, internet, and other utilities. Many providers require proof of address.
Create a checklist of post-arrival tasks and tackle them in order of priority. Start with address registration, as it’s the foundation for everything else.
Be Aware Of
Many newcomers make avoidable errors when handling post-arrival obligations. Here’s how to steer clear of them:
- Delaying Registration: Waiting too long can lead to fines and complications with other tasks.
- Incomplete Documents: Ensure your rental agreement and Wohnungsgeberbestätigung are complete and signed.
- Missing Appointments: Bürgeramt slots are limited, so book early and show up on time.
- Ignoring Tax ID: Your tax ID is crucial for employment and freelancing. Follow up if it doesn’t arrive within a few weeks.
Keep a folder with all your important documents (e.g., passport, rental agreement, Anmeldebestätigung) to stay organized and avoid last-minute scrambles.
*Pro Tip: Instead of viewing post-arrival obligations as a chore, turn them into an opportunity to explore Berlin and connect with locals. Pair each administrative task with a fun activity, why not? For example, after opening your bank account, treat yourself to a meal at a local restaurant, or visit a nearby café or park after your Bürgeramt appointment, to unwind. This makes the process more enjoyable and helps you feel part of this city Berlin.
Find assistance with visa and health insurance on the WelcomeBerlin Marketplace
Disclaimer
The information provided herein is for reference purposes only. This guide offers an overview of the key points to consider when navigating the visa application process. However, it is essential to seek professional legal assistance to ensure compliance with all deadlines and legal obligations.
12. Get Full Assistance With Your Visa
If You Want to Get Rid of The Stress And Paperwork
We’ve created an end-to-end solution for your permit. Either you want to enter Berlin or if you are already here and need to change or renew your visa, this Kit is for you.
Final Thoughts: Your Berlin Journey Starts Here
Navigating visas, permits, and legal obligations might seem daunting, but with the right mindset and preparation, it’s entirely within your reach. Think of this process as your first adventure in Berlin, a city that thrives on resilience, creativity, and a touch of rebellious spirit.
Remember, every expat who now calls Berlin home started exactly where you are. They faced the same challenges, asked the same questions, and overcame the same hurdles. And so can you.
Stay organized, stay curious, and don’t be afraid to ask for help when you need it. Berlin rewards those who are willing to put in the effort.
So, my friend. Take a deep breath, grab your documents, and dive in. Your Berlin story is waiting to be written —and it starts with staying legal. Welcome to Berlin.
Author: Christian Dittmann —Graphic Designer, Writer, Musician, Entrepreneur, Expat in Berlin.

Share this post using: